 Pin This
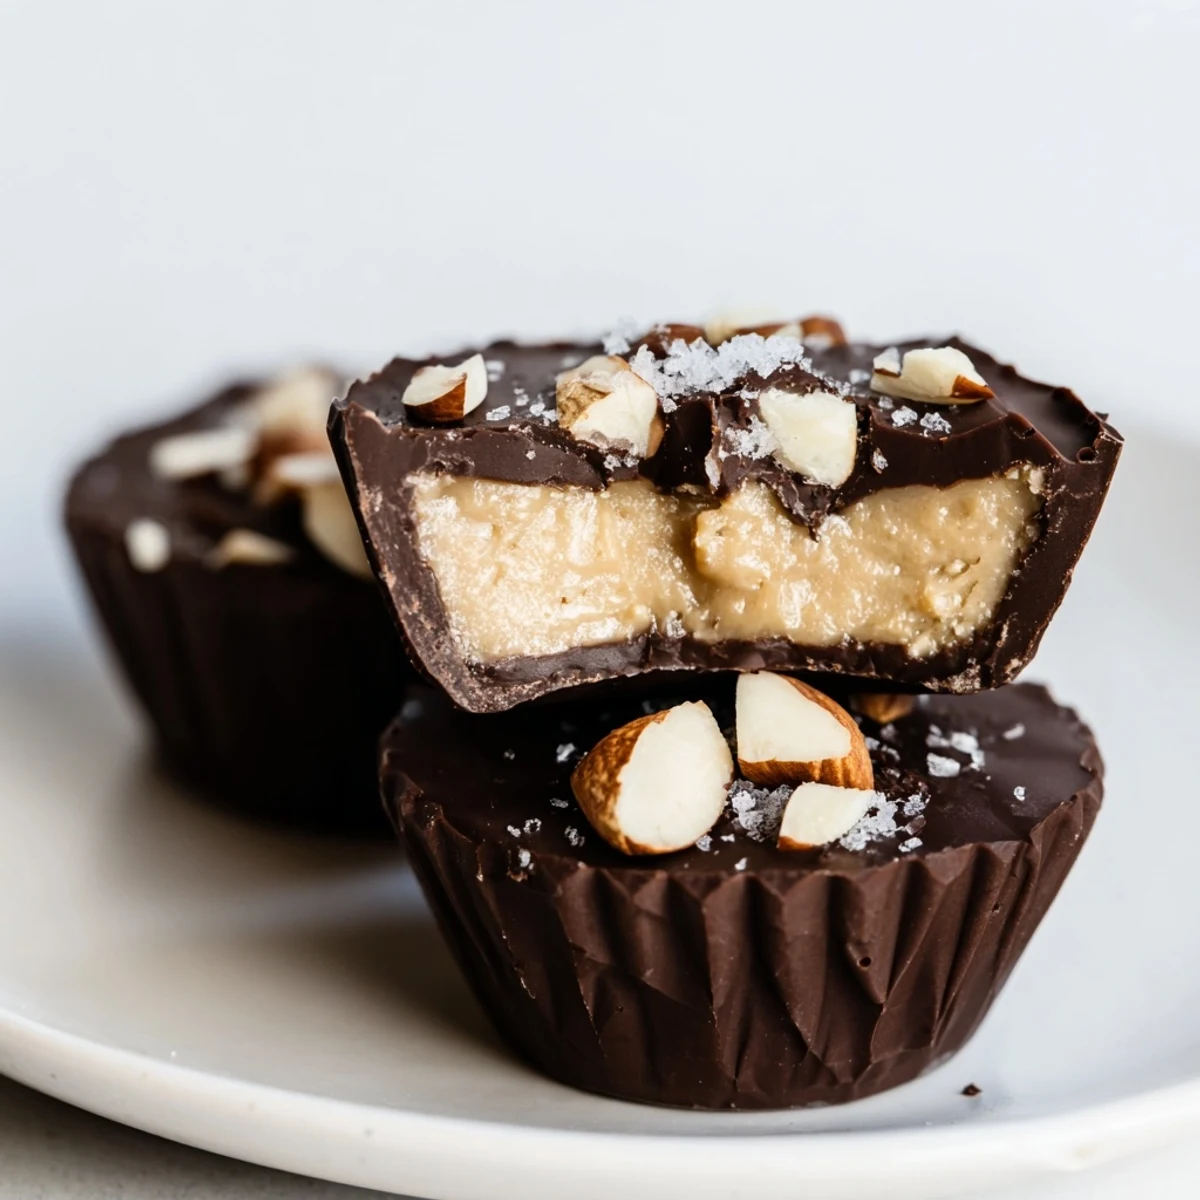
 These almond butter cocoa cups combine creamy, unsweetened almond butter with rich dark chocolate for an easy, no-bake sweet treat. The chocolate shell is melted and set before filling, then topped with additional chocolate. Optional roasted almonds and flaky salt add texture and flavor. With just a few wholesome ingredients and simple steps, they chill quickly for a satisfying dessert that's gluten-free and vegetarian-friendly. Perfect as a decadent snack or elegant end to any meal.
One afternoon while working through a bag of almond butter that seemed endless, I started experimenting with ways to make it feel like a real treat instead of just spread on toast. The first batch of these chocolate cups came together on a whim—melted dark chocolate, a dollop of almond butter, and a freezer that became my best friend. Something about biting through that crisp chocolate shell into the creamy center made the whole thing feel like an indulgence, not just a snack. Now these cups have become my go-to when I need something that tastes fancy but requires almost no skill.
I made these once for a friend who mentioned she was tired of feeling like she had to choose between 'healthy' and 'delicious.' Watching her face when she bit into one was worth every minute of prep—that moment when she realized dark chocolate and almond butter could be both indulgent and actually good for you. She texted me two days later asking if I could make them again because she'd finished the whole batch.
Ingredients
- Dark chocolate (200 g, 70% cocoa): The percentage matters more than you'd think—anything higher tastes bitter without sweetness to balance it, anything lower defeats the purpose of calling them 'dark' chocolate cups.
- Coconut oil (2 tbsp): This is the secret to getting your chocolate smooth and pourable without making it grainy, and it adds almost nothing flavor-wise so it won't fight with the almond butter.
- Almond butter (120 g, unsweetened): The real star—make sure it's unsweetened or you'll end up with something that's more candy than treat, and check that it's just ground almonds with maybe salt, nothing else hiding in there.
- Maple syrup or honey (2 tbsp): Just enough sweetness to make the filling taste intentional without overwhelming the almond flavor, and it adds a subtle richness that regular sugar won't give you.
- Vanilla extract (1/2 tsp): A small amount that rounds out the flavor and makes people wonder what that subtle something is.
- Sea salt (pinch plus more for topping): The pinch in the filling brings everything into focus, and the flaky salt on top is where people really taste the difference between these and any other chocolate cup they've had.
- Roasted almonds (2 tbsp, chopped) and flaky sea salt: Optional but honestly essential—they add texture and remind you that you're eating something made with real ingredients.
Instructions
- Set Up Your Station:
- Line your mini muffin tin with paper liners and get everything else ready so you're not scrambling while chocolate is melting. This is a recipe where a few minutes of prep saves you from a minor kitchen disaster.
- Melt the Chocolate:
- Set a heatproof bowl over simmering water (not touching the water itself) and add your chopped chocolate with the coconut oil, stirring until it's completely smooth and glossy. If you try to rush this by heating it directly, the chocolate will seize up and you'll have a grainy mess—the double boiler method is non-negotiable.
- Create the Chocolate Shell:
- Spoon about a teaspoon of melted chocolate into each liner and use the back of the spoon to coat the bottom and sides, creating a little chocolate cup. The thinner your shell, the more room for filling, so use restraint here—think delicate, not thick.
- Freeze the Base:
- Pop the tin into the freezer for 10 minutes so the chocolate sets completely and won't leak when you add the filling. This pause is when you can mix your filling so everything's ready to go.
- Prepare the Almond Butter Filling:
- In a small bowl, stir together the almond butter, maple syrup, vanilla, and a pinch of salt until smooth and creamy. It should feel like soft cookie dough—spreadable but holding its shape.
- Fill the Cups:
- Take the tin out of the freezer and add a heaping teaspoon of almond butter mixture to each chocolate cup, flattening it slightly with the back of your spoon. Leave a little room at the top because you're about to seal these with another layer of chocolate.
- Seal with Chocolate:
- Top each cup with another teaspoon of melted chocolate, spreading it gently to cover the almond butter completely and create a seal. Give the tin a gentle tap on the counter to smooth out any rough tops and get the chocolate to settle evenly.
- Add Optional Toppings:
- If you're using them, sprinkle a few chopped almonds and a pinch of flaky salt onto each cup before the chocolate sets completely so they stick. This is where the recipe goes from 'pretty good' to 'why does this taste like I made it in a professional kitchen.'
- Final Freeze and Store:
- Return everything to the freezer for at least 30 minutes until the cups are completely solid and hold together when you peel away the liner. Once set, store them in an airtight container in the refrigerator where they'll keep for up to two weeks, though they rarely last that long.
 Pin This
 There's a quiet victory in making something that feels like a special purchase but costs a fraction of the price and tastes infinitely better because it's made with your own hands. These cups have become my answer to 'I want something sweet but also want to feel good about what I'm eating'—a category of dessert that shouldn't exist but does, and it tastes like chocolate and almond butter remembering they're actually friends.
Why the Double Boiler Method Matters
I learned about chocolate seizing the hard way, back when I thought melting it directly over heat was just fine because 'how much damage could a few minutes do.' The answer is a lot of damage—your chocolate goes from silky to grainy in seconds and there's no coming back. The double boiler method feels old-fashioned until you realize it's literally the only way to handle chocolate if you want a smooth shell, and once you understand why (the gentle, indirect heat protects the cocoa butter), it stops feeling like extra work and starts feeling like wisdom.
Flavor Variations That Actually Work
The base recipe is perfect on its own, but sometimes I adjust it depending on my mood or what I have on hand. A tiny pinch of cinnamon in the filling creates this warm, almost spiced feeling that makes you want to eat them with coffee; a splash of espresso powder makes them taste darker and more sophisticated; and once I tried swirling in a tiny bit of honey right before freezing and somehow created something that tasted like a completely different dessert. The beauty of this recipe is that the structure is so forgiving that you can play with it without breaking anything.
Making Them for Other People
These make perfect gifts because they feel luxurious but require zero pretension—they say 'I made something special for you' without saying 'I spent all day in the kitchen.' I've packed them in little boxes with parchment paper between each one, given them to neighbors, brought them to potlucks where they disappeared before anything else, and watched skeptics become believers after one bite. There's something about a homemade chocolate cup that breaks down walls in a way a store-bought box never could.
- Store them in a container in the refrigerator and they'll stay perfect for two weeks, though they're honestly best eaten within the first few days when the chocolate is still crisp and the almond butter is creamy.
- If you're making them ahead for a gift or party, prepare them three or four days early so you're not stressed the morning of—they only get better as they sit.
- Double or triple the batch without any adjustments to timing or temperature; the only thing that changes is how many liners you'll need and how quickly they'll disappear.
 Pin This
 Making chocolate cups at home turns out to be the kind of small kitchen project that feels monumental in the eating but effortless in the doing. Once you've made them once, you'll understand why they're the dessert you return to again and again.
Recipe FAQs
- → How do I make the chocolate shell for the cups?
-
Melt dark chocolate with coconut oil using a double boiler, then spoon into liners and freeze until set.
- → Can I substitute almond butter with other nut butters?
-
Yes, peanut or cashew butter can be used as alternatives for different flavor profiles.
- → What sweeteners work well in the filling?
-
Maple syrup or honey both add natural sweetness and blend smoothly with almond butter.
- → How long should the cups chill before serving?
-
Freeze the filled cups for at least 30 minutes until firm and fully set.
- → Are there options to make this vegan-friendly?
-
Use maple syrup in place of honey and ensure your chocolate is dairy-free for a vegan version.